
Nexus3搭建配置
参考链接:
PS:
- nexus分为nexus-repository-oss(免费版)和nexus-repository-pro(商业版)
- 主要使用版本:2.x和3.x
- 版本区别:官方文档
JAVA项目依赖管理方法:
- 所有依赖jar包都上传提交到代码库里面:
- 优点:直接获取代码库代码就可以进行编译打包,不需要依赖外部网络(独立个人小项目)
- 缺点:
- 依赖包体积很大,导致代码获取推送太耗时和占用带宽;
- 基础框架依赖包每个代码库都要存放一份(空间浪费);
- 当前依赖包版本不明确。
- 依赖包编译过程中下载,不上传到代码库:
- 优点:
- 代码库干净,体积小;
- 项目显性配置依赖包版本和引用阶段清晰明了。
- 优点:
私服的优点:
- 统一服务器代理外部依赖(节省外网带宽);
- 项目下载依赖通过内部网络的进行(更快);
- 托管内部项目依赖(协作更方便);
- 托管第三方依赖(例如:合作伙伴的依赖包)
搭建环境版本:
- OS: Windows Server 2012 R2
- JDK: 1.8.0_71
- nexus-repository-oss 3.6.0-02
搭建步骤:
- 安装JDK
- 官网下载:nexus-3.6.0-02-win64.zip,解压缩
- 配置windows服务:官方文档
1
$install-dir/bin/nexus.exe /install <optional-service-name>
- 启动服务:
1
nexus.exe /start <optional-service-name>
- 网页端登陆配置Nexus
- http://$ip:8081
- 用户名/密码:admin/admin123
后台配置:
- data目录修改
1
2
3
4
5
$install-dir/bin/nexus.vmoptions
-Dkaraf.data=../sonatype-work/nexus3
-Djava.io.tmpdir=../sonatype-work/nexus3/tmp
-XX:LogFile=../sonatype-work/nexus3/log/jvm.log - 服务端口号修改:
1
2
3
4
$data-dir/etc/nexus.properties
# Jetty section
application-port=8081 - jvm性能调优:以上修改都需要重启服务生效。
1
2
3
4
5
$install-dir/bin/nexus.vmoptions
-Xms4G
-Xmx4G
-XX:MaxDirectMemorySize=4014M
前台配置:
使用管理员admin账号登陆
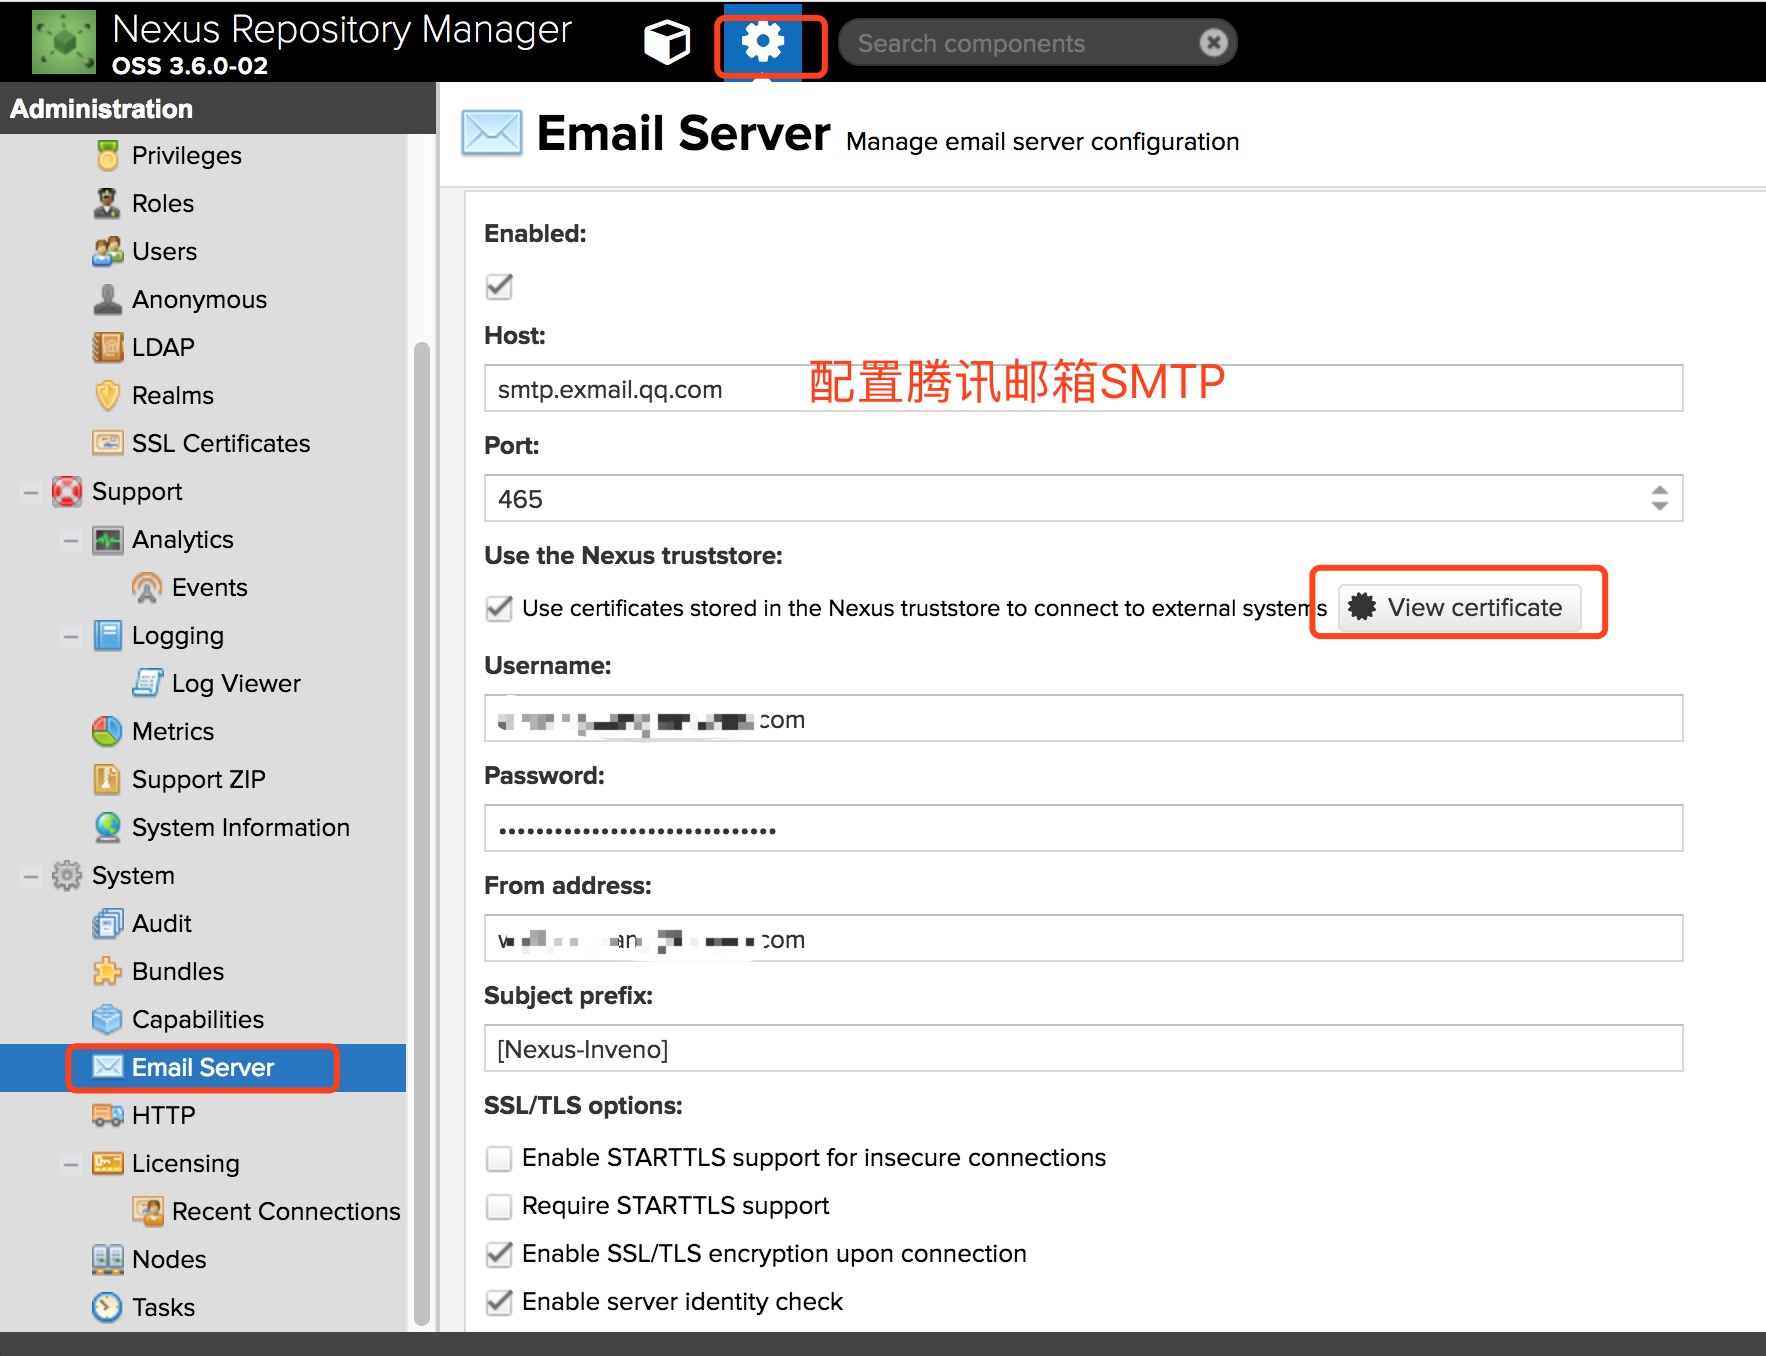
配置邮箱
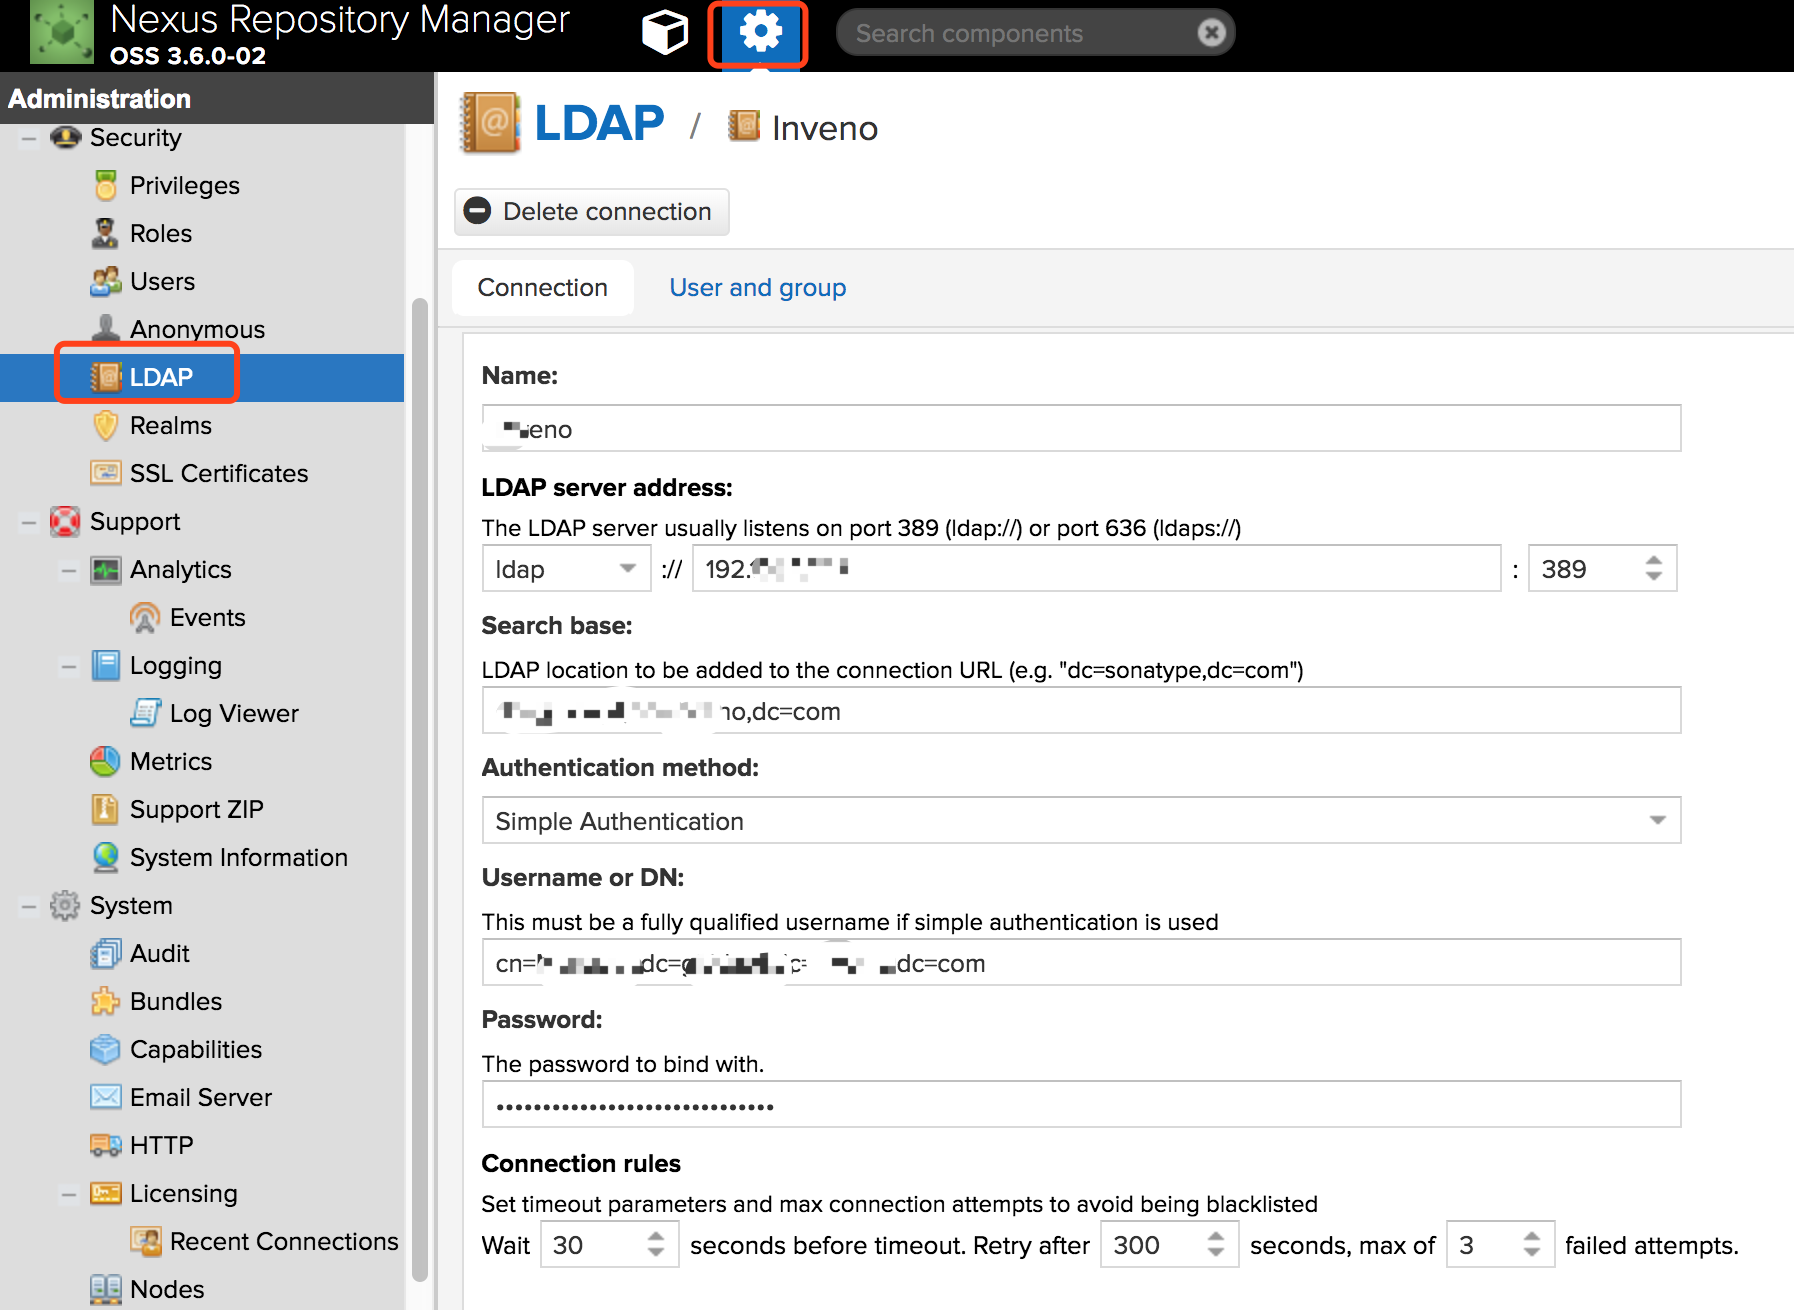
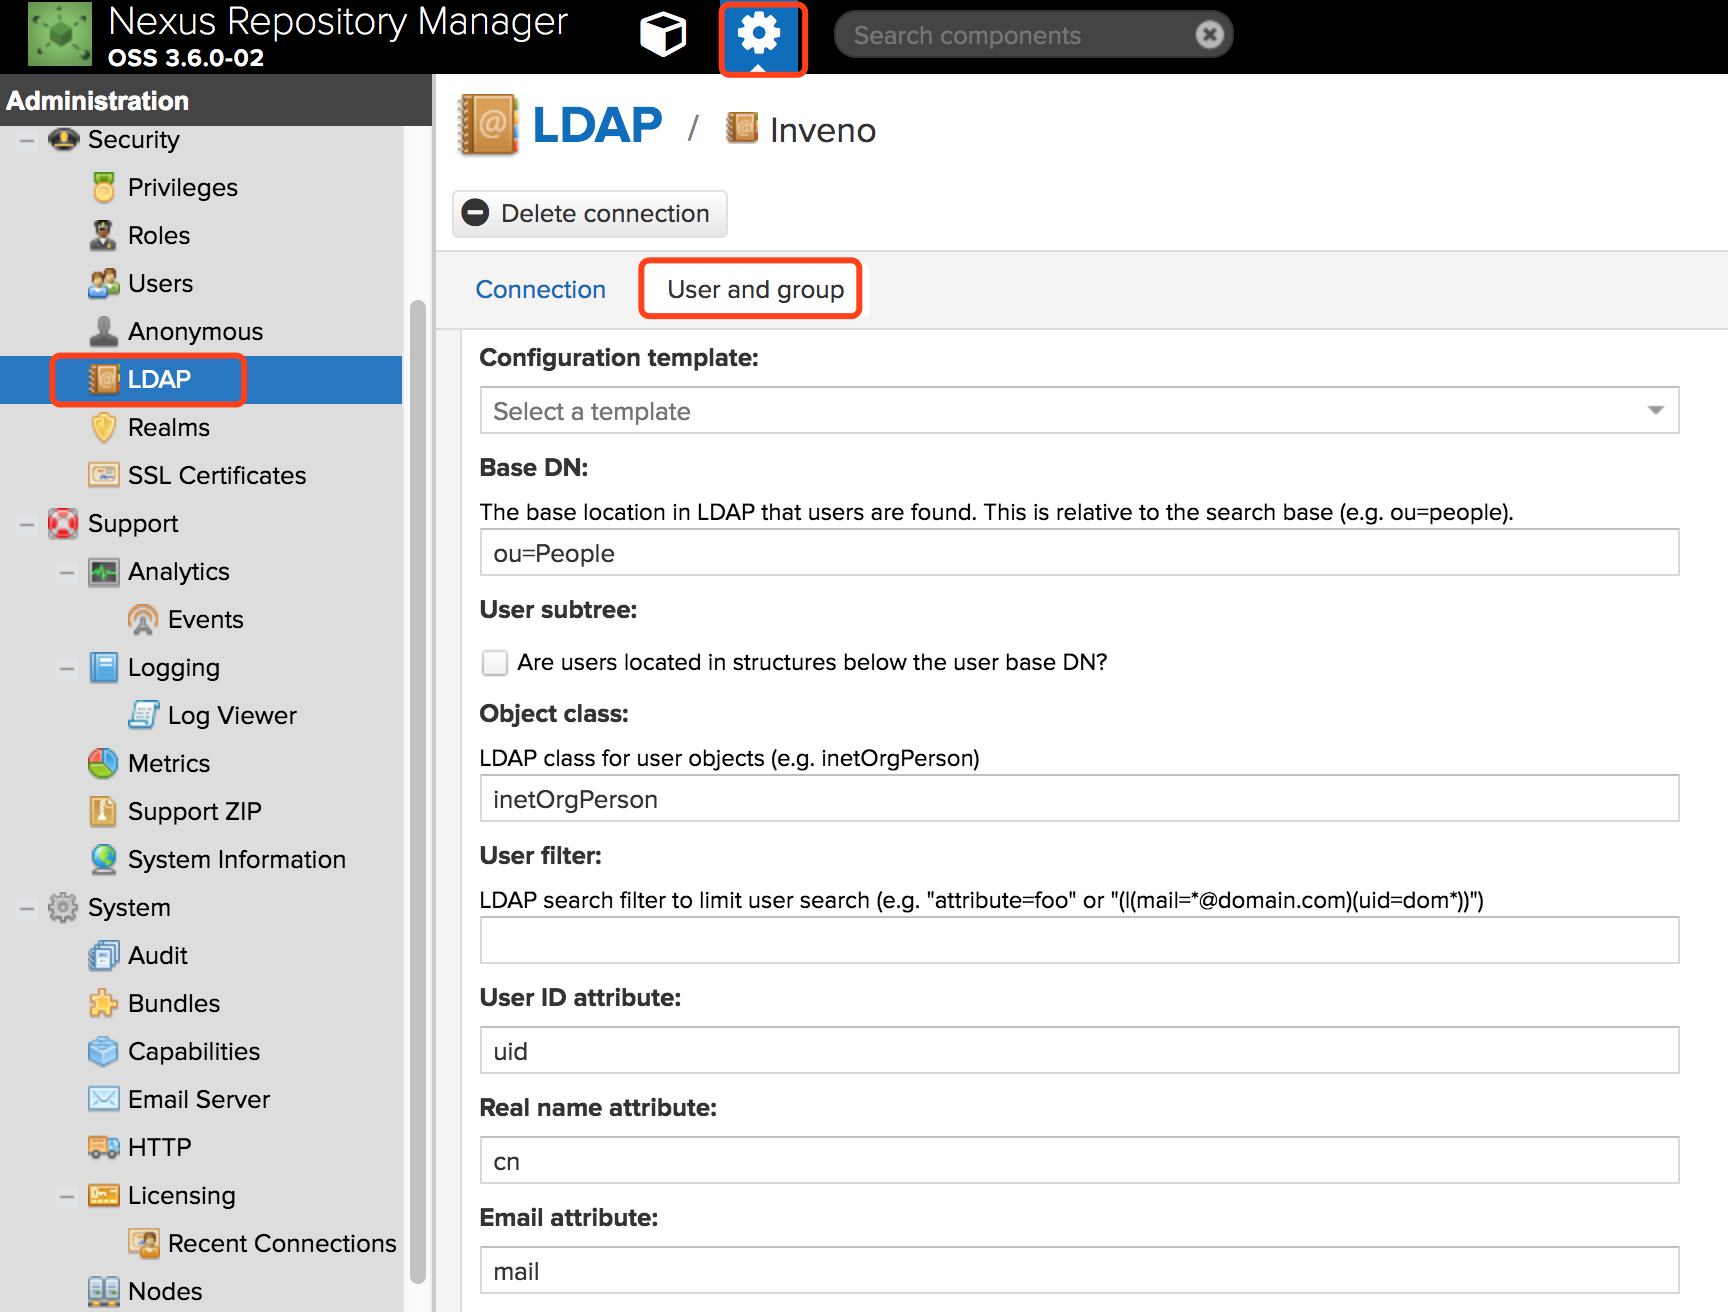
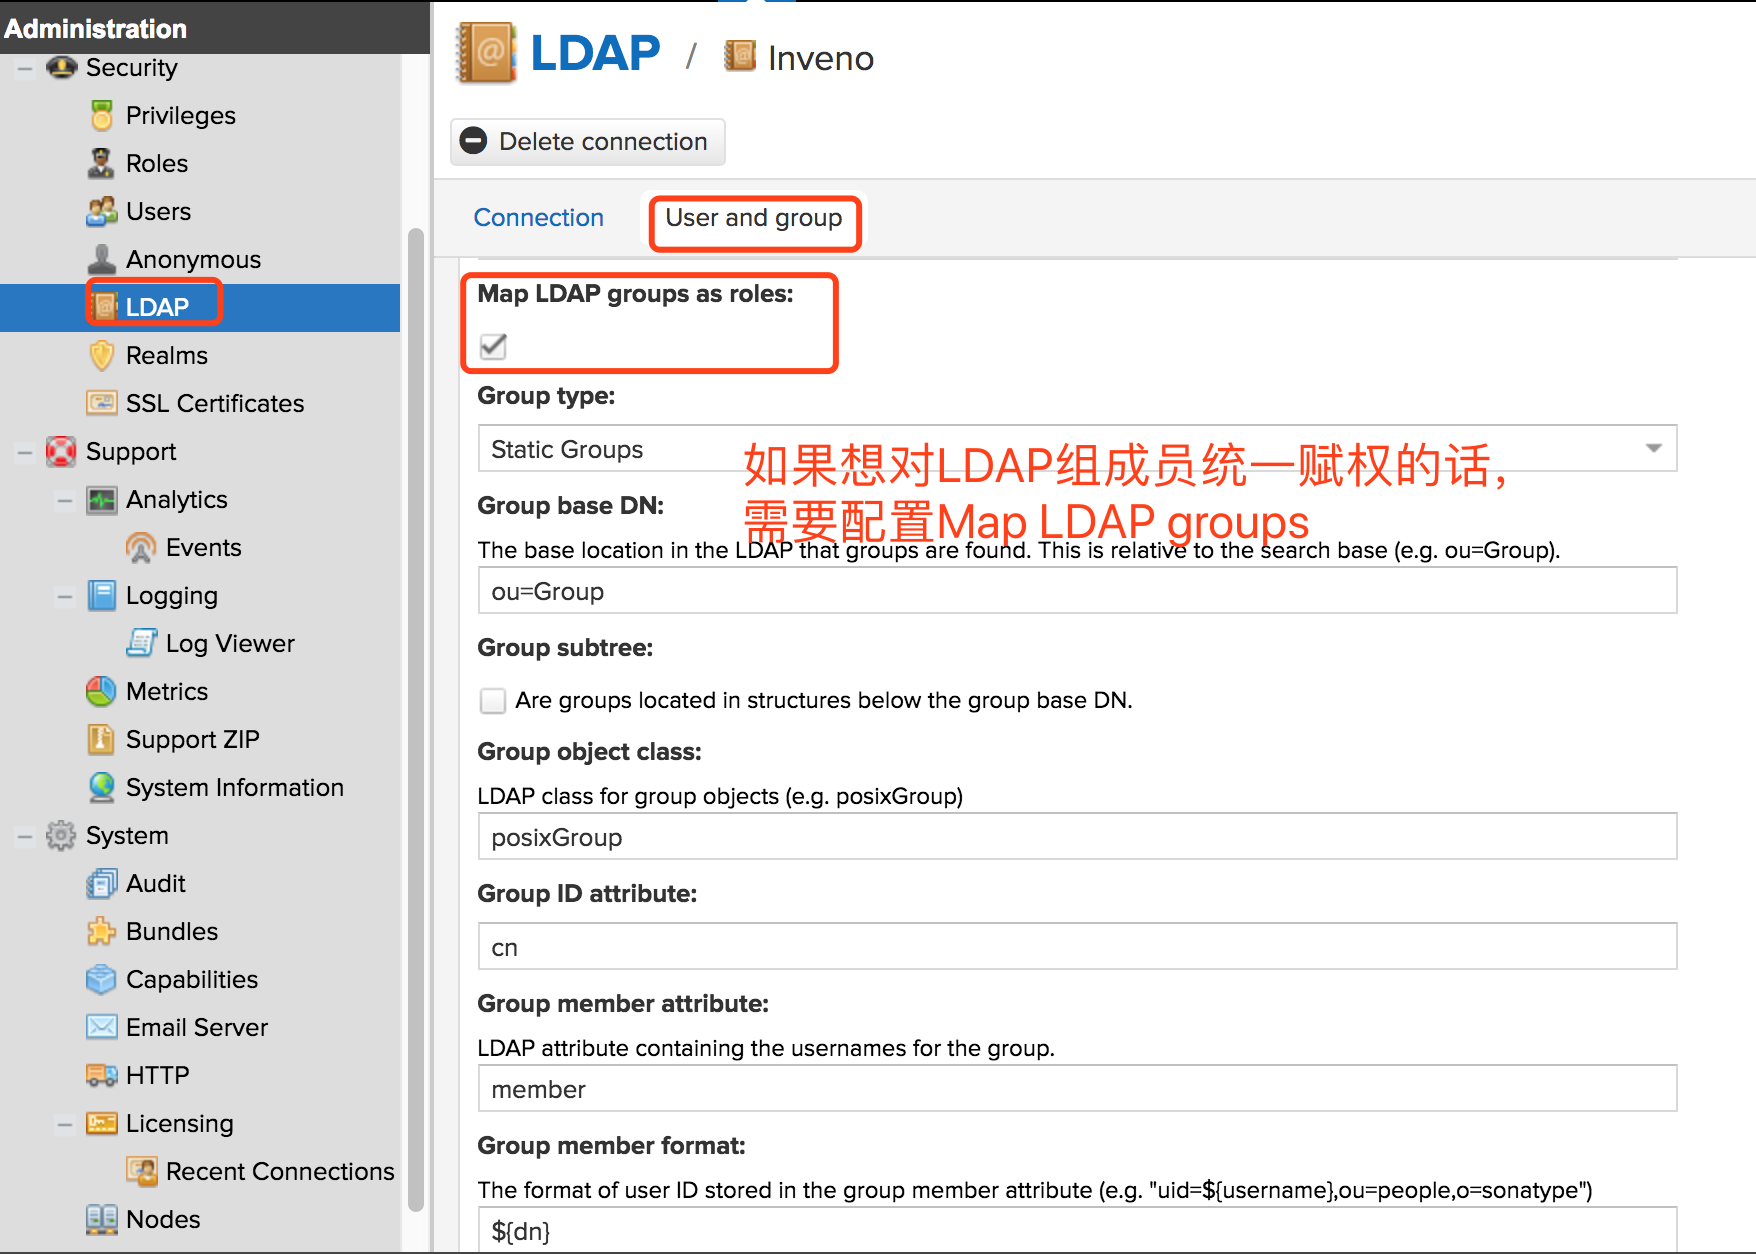
配置LDAP
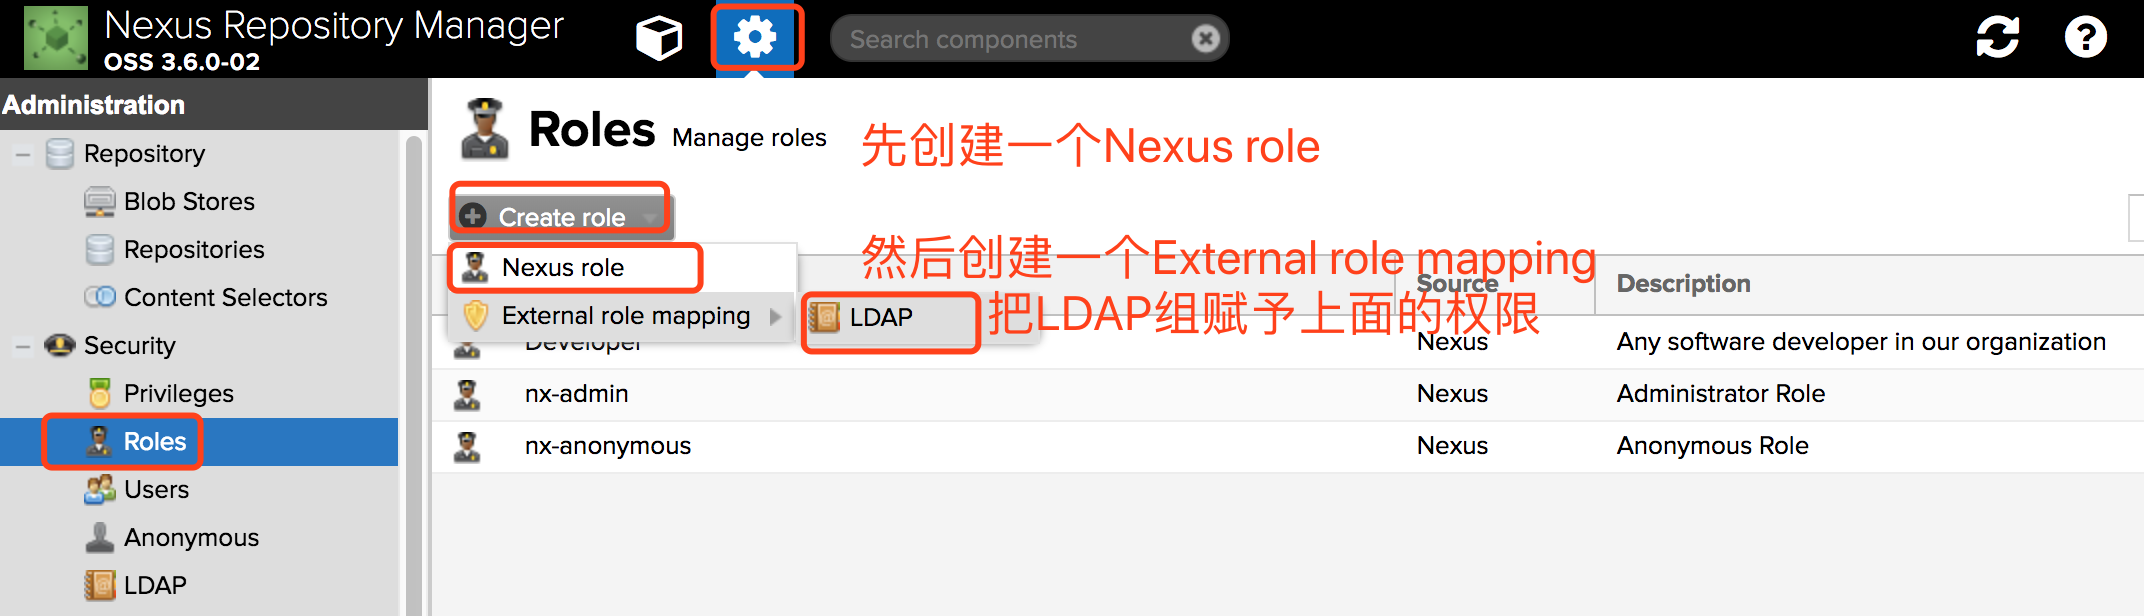
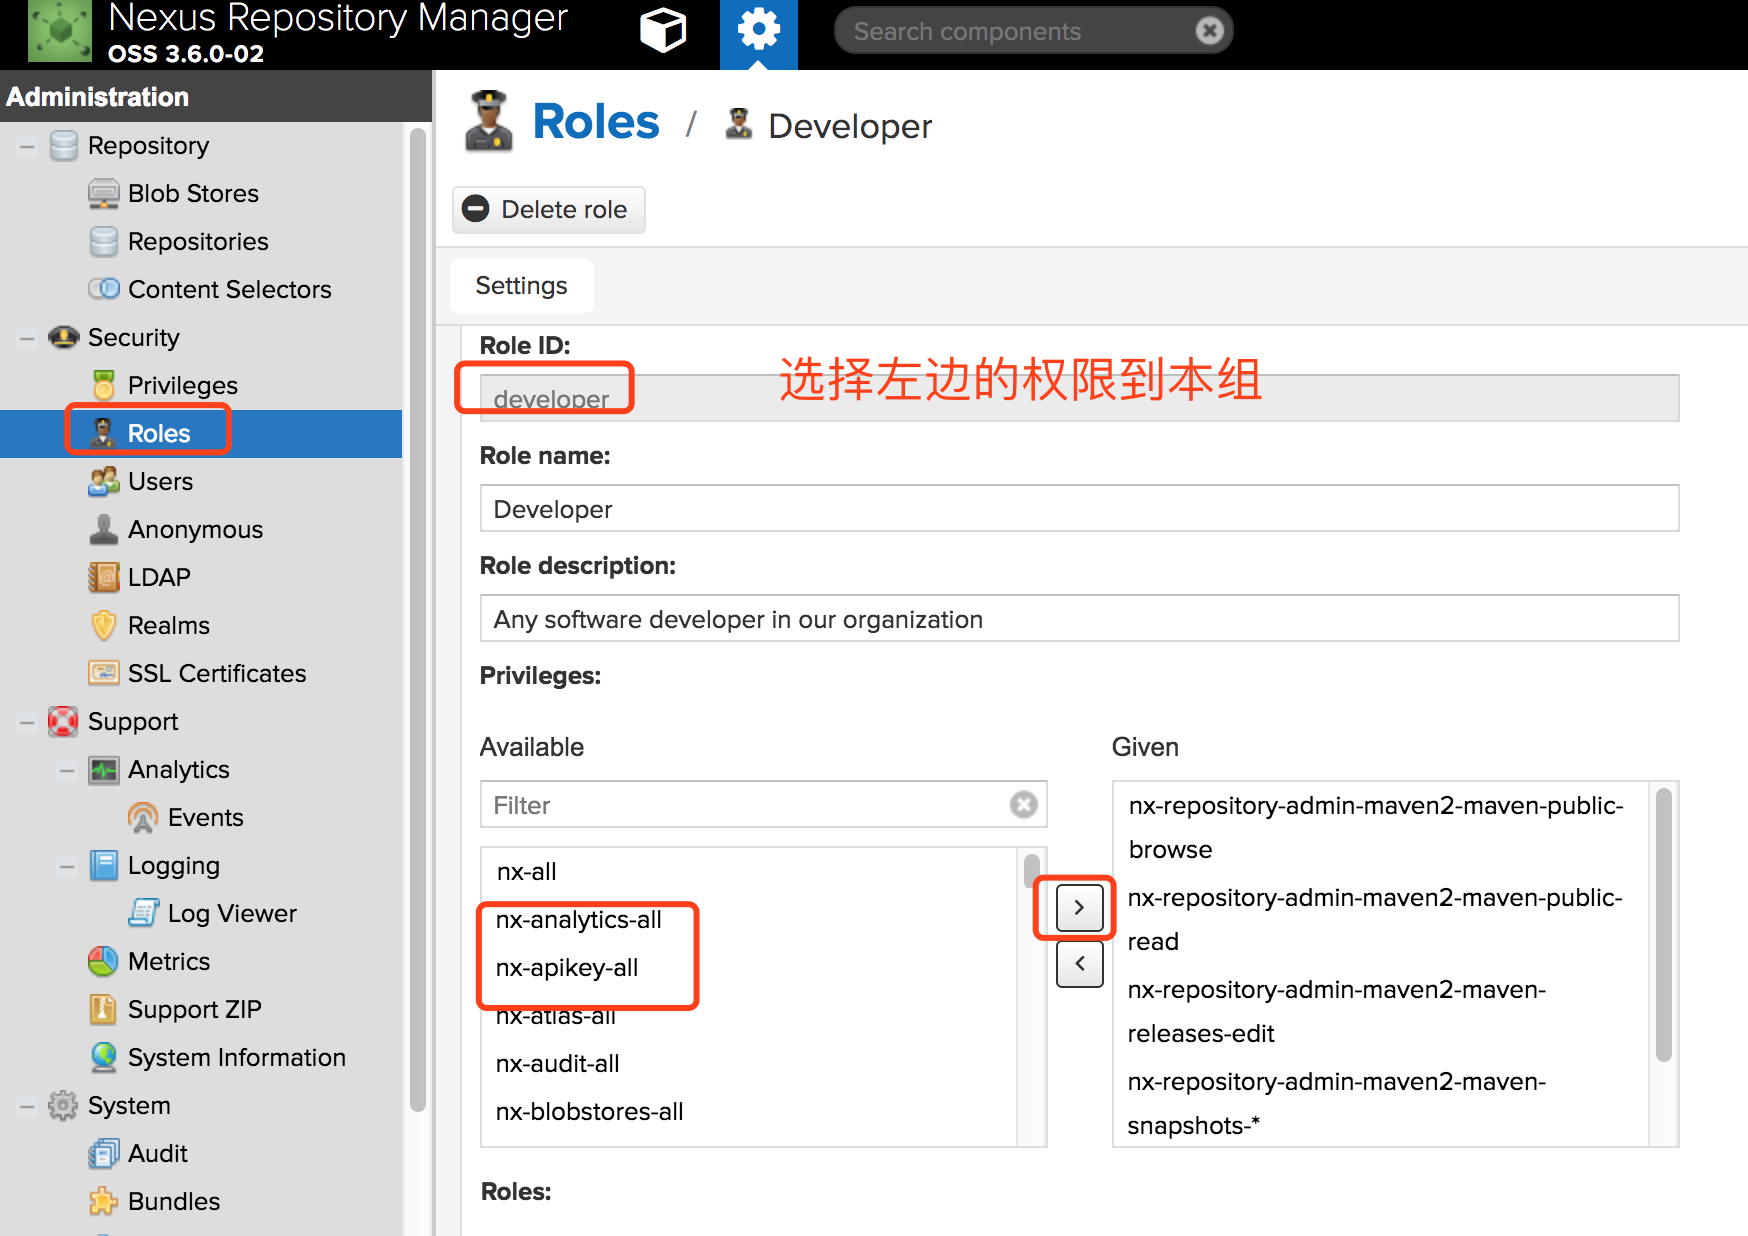
配置权限

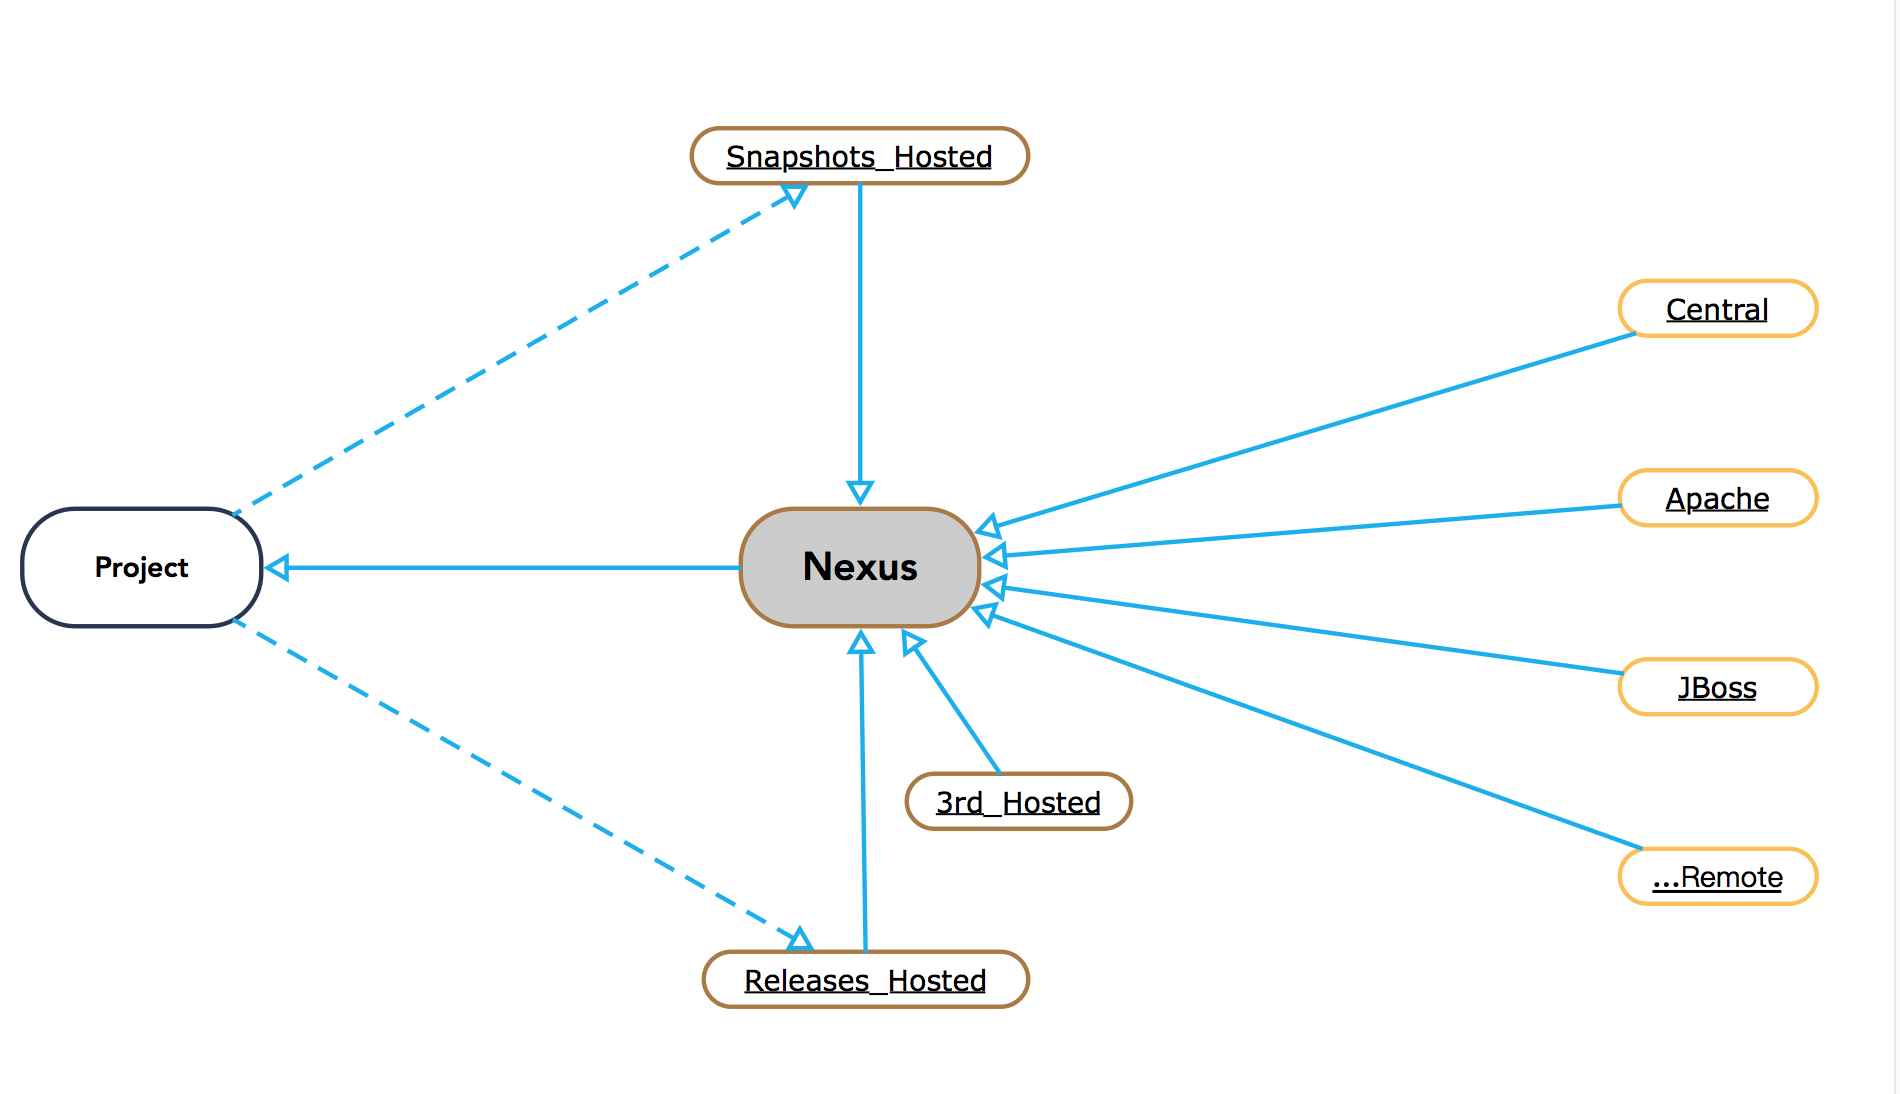
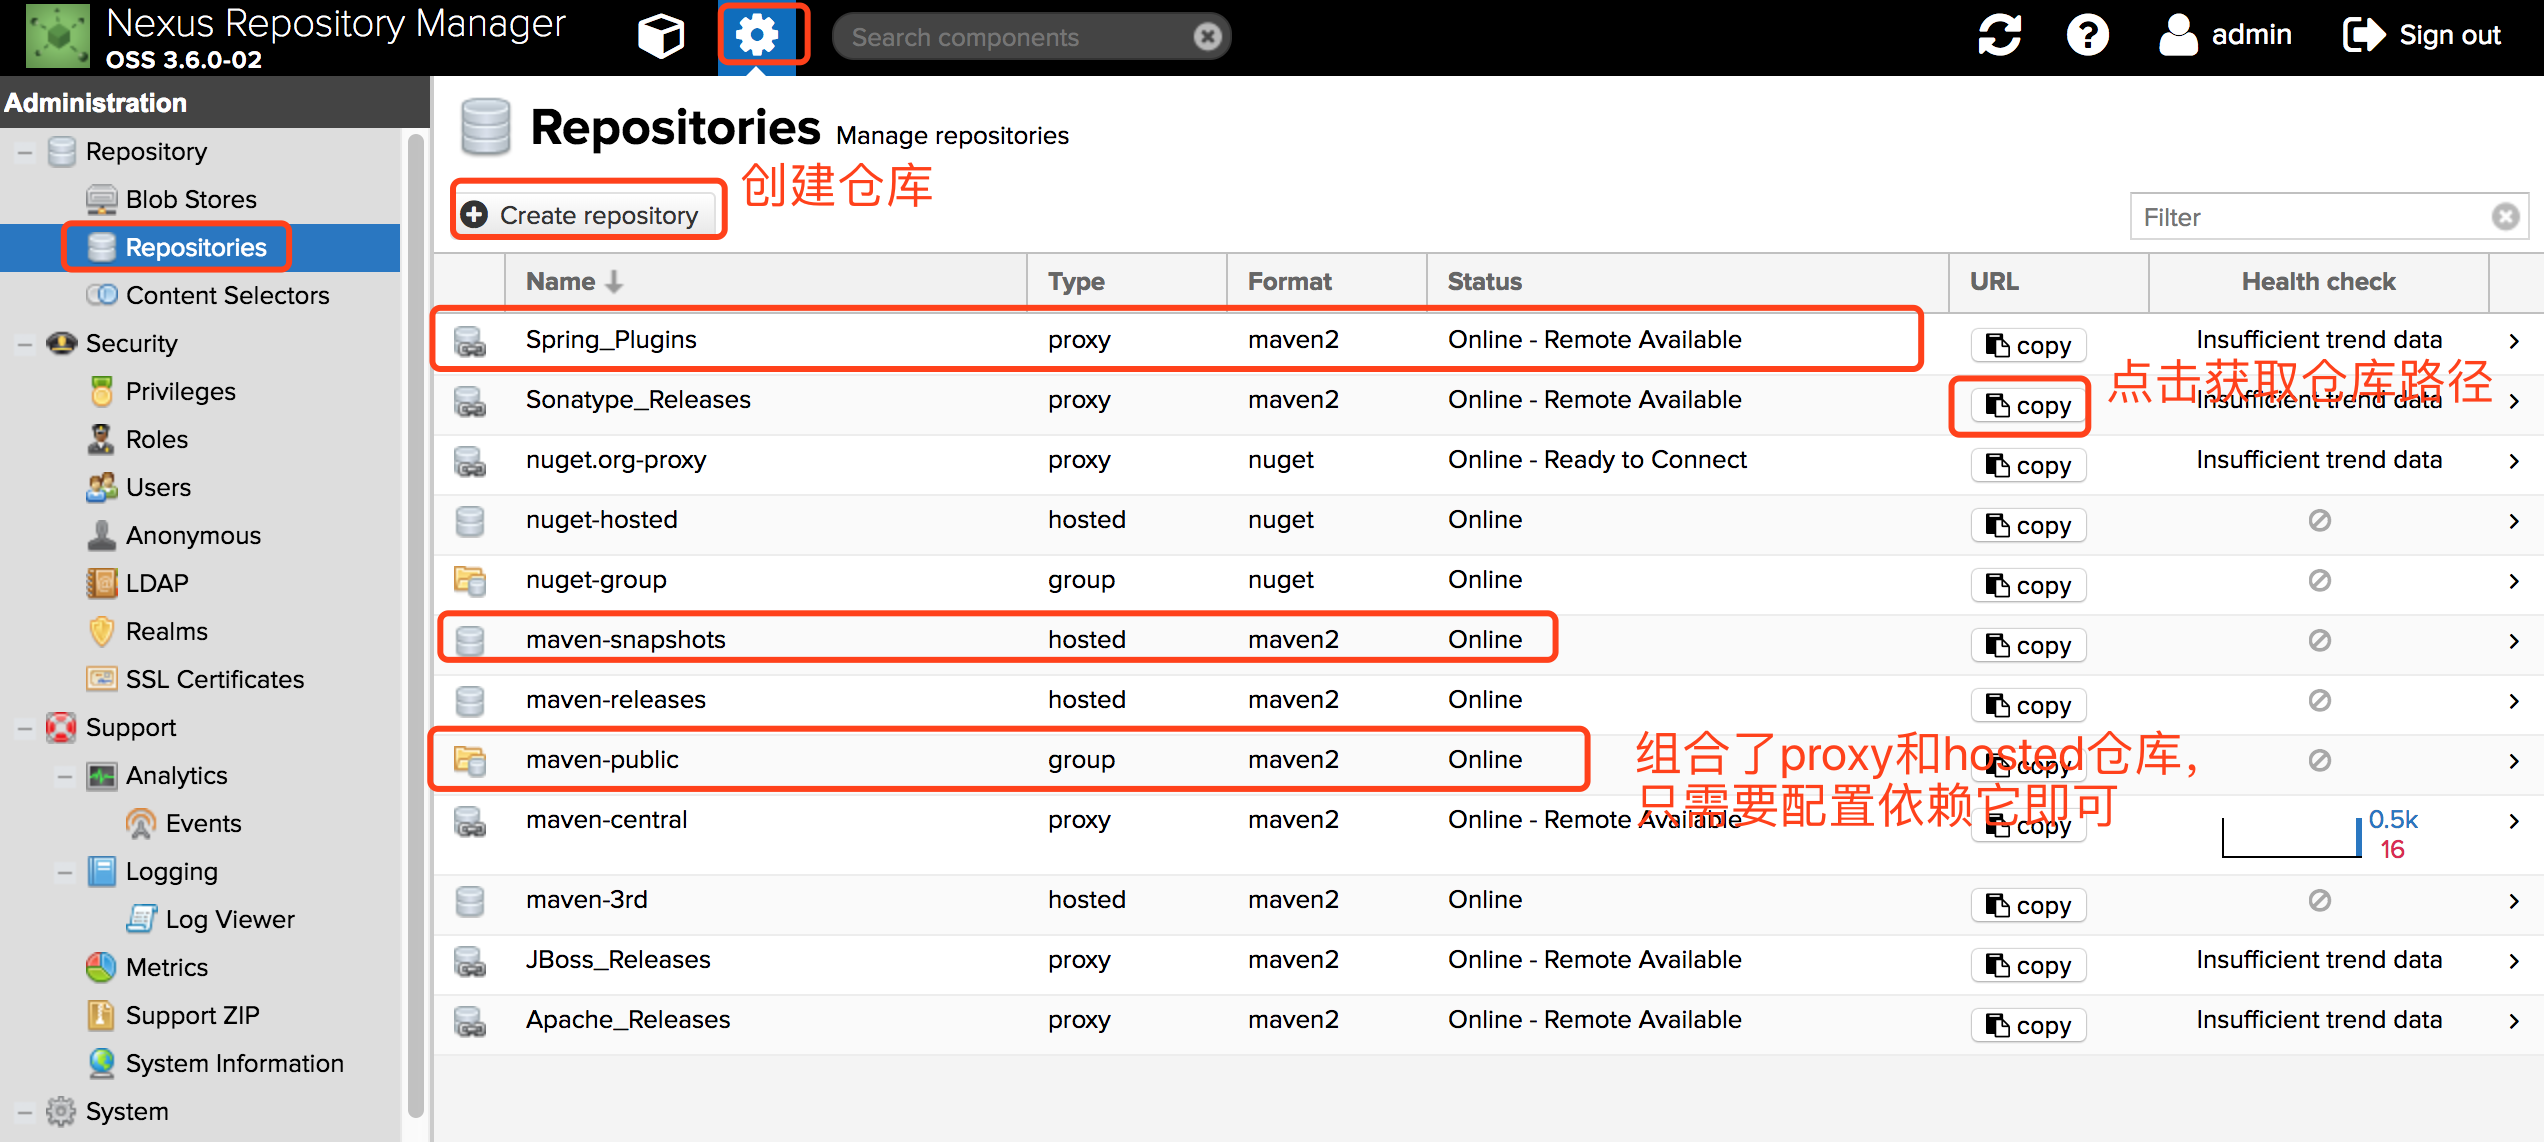
配置repositories
repositories分为三个种类:
- proxy 代理远端仓库
- hosted 本地内部仓库
- group 组合仓库
Maven依赖私服配置
修改~/.m2/settings.xml
1 | <settings> |
内部项目上传jar包:
修改项目pom.xml文件增加
1 | <distributionManagement> |
然后执行:
1 | mvn clean deploy |
上传第三方jar包:
nexus3不能使用web端来上传第三方jar包,只能使用命令行:
1 | mvn deploy:deploy-file -DgroupId=$groupId -DartifactId=$artifactId -Dversion=$version -Dpackaging=jar -Dfile=$path/XX.jar -Durl=http://$ip:8081/repository/$hosted_3rd/ -DrepositoryId=nexus |